The currciulum for this course is at maker100-curriculum
An economical version of my successful Maker100 Robotics, IoT and TinyML Machine Learning in-person course this time using less expensive hardware such as the $13.99 USD Seeedstudio XiaoEsp32s3 for the course basics and some EdgeImpulse.com cell phone assisted machine learning and the $14.50 USD RakWireless RAK2270StickerTracker for the LoRa/LoRaWan and Motion (x,y,z) machine learning using tinyMLjs a static webpage webSerial Machine Learning method I have made.
Views better using the README.md here
This is not an online course, it is expected to be taught by a teacher or professor. Some students might be able to do the course on their own, but many components of learning opportunities may be missed.
Price list for the equipment I will be using in 2024 price-list-2024.md (Many other devices could be used but the videos then will not be accurate for those devices)
Teacher Extras
Why Not use the XIAO Expansion board and Round Display?
The Seeedstudio [$16.40 USD Exanpsion board](https://wiki.seeedstudio.com/Seeeduino-XIAO-Expansion-Board/) and [$18.00 USD Round Display](https://wiki.seeedstudio.com/get_start_round_display/) are amazing inexpensive addons to the XIAO-ESP32s3-sense and are very well explained on the Getting started sites listed above.I have both for my classrooms and may use them as the year goes on, but I have testing to do to find out if the color round display is as fast as my grayscale OLED and I do not like students using I2C and SPI connectors that come with the expnasion board because the students naturally begin to feel that they can only use sensors and actuators that come with the correct connectors.
The students for their final projects stay away from new or unusual sensors/actuators because those sensors do not come with the correct connectors. A possible solution is to have the [grove-4-pin-female-jumper-wire](https://ca.robotshop.com/products/grove-4-pin-female-jumper-wire) I would prefer the male pins but it is electrically safer to have the female pins. It also does not help that so many boards use different connectors. I have lots of sensors with connectors that don't work with the grove systems. If you are just starting a course and know that you are going to stick with the [Grove sensor actuator system](https://wiki.seeedstudio.com/Grove_System/) and have a few extra connectors on bare wires ordered for new devices then the expansion board might be a great way to teach.
If you choose to uswe the expansion board this ebook [here](https://mjrovai.github.io/XIAO_Big_Power_Small_Board-ebook/) covers working with it very well.
Teacher Tips
- Students work on term assignments in partners and make very short videos that teach what they did for each assignment.
- I expect all students to try to improve and change each assignment. "Until you change computer code do not expect to understand it"
- MAKE EACH STUDENT DRAW THEIR OWN CIRCUIT DIAGRAM FOR EACH ASSIGNMENT. For easy assignments I make it hard for the students to know how to connect the wires. I only give students clear diagrams for the difficult connections. Let students think. These are not fully made recipes!
- I expect all students to draw circuit diagrams before connecting wires and have someone check the diagram and then to connect the wires and have someone also check before stuidents connect power to the device.
- I teach one assignment per class but expect several students to work ahead and solve missing parts of the prossess in small groups, also some students will fall behind, this allows us to have fewer sensors and actuators since the class rarely uses them at the same time. I can often get away with 4 sensors for an entire 30 person class
- This Github of very fast instructions allow more dedicated students to work ahead and helps student who missed a class or are good reminders for students who need extra time. THE VIDEOS ARE NOT EXPECTED TO BE AN ONLINE COURSE. THIS IS AN IN-PERSON COURSE! Educators can add important information and problem solve many issues that are very difficult to solve when at home by yourself in a fast paced changing technological landscape.
- The faster students finish the course the more time they have for their final projects
- To pass the course everyone must complete at least one final project using a sensor connected to an actuator of their choice
- Students plan 2 individual main projects and possibly one group project. Each main project must include at least one sensor with one actuator
- Many student's will only complete one main project and that is fine. "Robotics projects are very difficult to finish"
- Many final projects will need structures built to support them. Any safe material is fine, we typically 3D print the sturctures although carboard and or wood is often used
- Final projects typically do not involve high voltage, water or drones for the obvious safety reasons.
- I tell students that if every term assignment is complete the indivdual final project is there full mark if that helps their grade
- Teacher's may decide to make several of the advanced assignments optional or even set for bonus marks
- Use an LLM such as ChatGPT to help understand what the code does or how to improve the assignment
Why Maker100-Eco?
The arduino PortentaH7 with LoRa Vision Shield is an encredible TinyML device that can do amazing things and has been a joy to teach, but I am part of an international group trying to bring tinyML to the students in developing countries called [tinyML4D](https://tinyml.seas.harvard.edu/team) and the Arduino PortentaH7 is just too expensive for student explorations.Since schools spend a large amount of their budget on Computers, Laptops, iPads and the technology to integrate them safely with the internet I feel that any method technology teachers can do to reduce costs is good for the entire educational system.
How much cheaper is the Eco version
The Arduino PortentaH7 costs $113.90 USD the LoRa Vision Shield Costs $69 USD
The XiaoEsp32s3-sense costs $13.99
and the RAK2270 Developer costs $14.50 USD
So
3 x ($113.90 + $69) = 3 x $182.90 = 548.70 > 15 x $13.99 + 15 x $14.50 = $209.85 + 217.50 = $427.35
3 x PortentaH7 + vision shield = $548.70 USD which is more than 15 x (XIAO-esp32s and RAK2270 ) = $427.35 USD
Note: the rak2270 will need a few ~$10 rigs to communicate over a serial monitor
So for the price of 3 PortentaH7 with LoRa Vision shields I can get a full class set of 15 MCU's of both types (XIAO-sense and RAK) that span my complete curriculum
Probably a good idea to spend a bit of money purchasing the clips and RAKDAP1's for connecting the RAK2270 Sticker Trackers to serial ports. Although soldering the wires to the board pads and using a TTL usb-to serial cable is another option.
Very hard to compare the Xiao/Rak class set of $427.35 USD with a class set of PortentaH7's ($15 x $182.90) = $2743.50 USD
Useful Links
- Simplified course layout and organization course-order.md
- The original Maker100 Course is https://github.com/hpssjellis/maker100
- Excellent reference for the Xiao Esp32s3 section of this course XIAO_Big_Power_Small_Board-ebook
- SeeedStudio Link to the XiaoEsp32s3-Sense store https://www.seeedstudio.com/XIAO-ESP32S3-Sense-p-5639.html Note: It needs headers soldered to do many of the assignments.
- RakWireless ~$15 USD RAK2270 Sticker Tracker store is at https://store.rakwireless.com/products/rak2270-rak-sticker-tracker?variant=43046272303302)
- The original XiaoEsp32s3 and RAK2270 research is at https://github.com/hpssjellis/mcu-stable-edu-launch
- TinyMLjs is at https://github.com/hpssjellis/tinyMLjs
- RocksettaTinyML Library is at https://github.com/hpssjellis/RocksettaTinyML
Arduino Preferences for both the Xioa-Esp32s3 and the RAK2270-Developer-sticker-tracker Note: They are comma seperated
https://raw.githubusercontent.com/espressif/arduino-esp32/gh-pages/package_esp32_index.json,https://raw.githubusercontent.com/RAKwireless/RAKwireless-Arduino-BSP-Index/main/package_rakwireless.com_rui_index.json
Video showing how to setup the XiaoEsp32s3. There are also lots of other instructions online to help with setup.
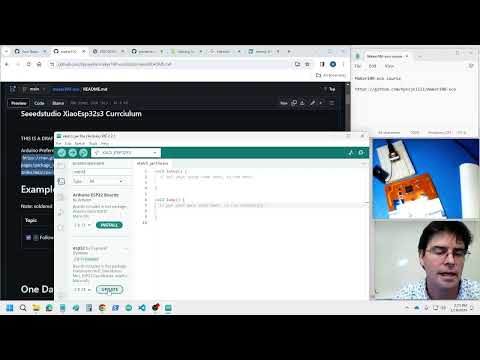
Note: soldered headers not needed, but a USB-C cable and computer or laptop to run the code is neede
| Topic | Example Code | Video | Instructions and Prompt |
|---|---|---|---|
a01 Follow the Sensecraft Vision example |
wiki.seeedstudio.com/sscma/ direct webpage https://seeed-studio.github.io/SenseCraft-Web-Toolkit/ | More Instructions...ChatGPT Prompt... |
Note: soldered headers are not needed, but a cell phone or webCam laptop is needed, along with a usb-C to USB-A cable Students are encouraged to work ahead.
| Topic | Example Code | Video | Instructions and Prompt |
|---|---|---|---|
a02 Make a vision classification machine learning model using your cell phone |
edgeimpulse.com | 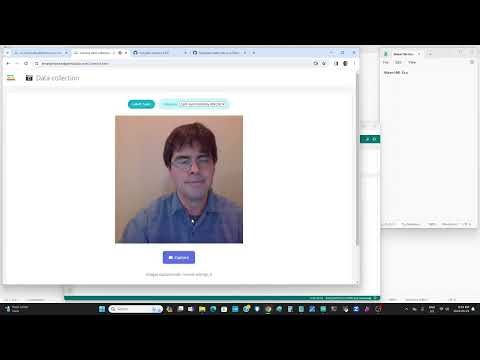 This is a full playlist so many other videos here might help This is a full playlist so many other videos here might help 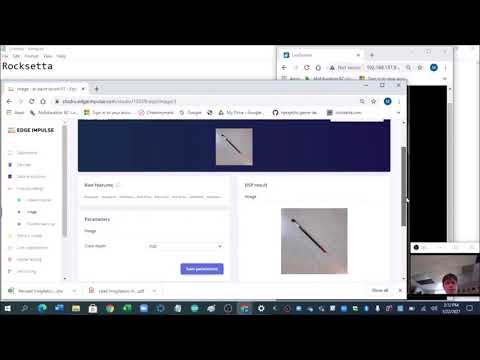 |
This website is a good starting point https://hpssjellis.github.io/multi-language-edgeimpulse-tutorial-vision-cell-phone/. For this assignment we are not using the microcontroller. More InstructionsConnect your cell phone to EdgeImpulse, take 30 images of pens on various backgrounds, then take 50 images of various backgrounds, create your impulse (96 x 96), generate features, train and then switch to classification on your cell phoneChatGPT PromptGive me the steps to make a vision classification model on edgeimpulse.com with only an unknown label for the background and pens for the object. We will only be using our cell phone to collect the images, so it will need to be connected to the edgeimpulse site. The cell phone will allow the image labelling before I take the images. After the images are taken explain how to setup the impulse machine learning model. |
a03 Xiao Esp32s3 LED Blink and Serial Print |
seeed-blink-serial.ino | 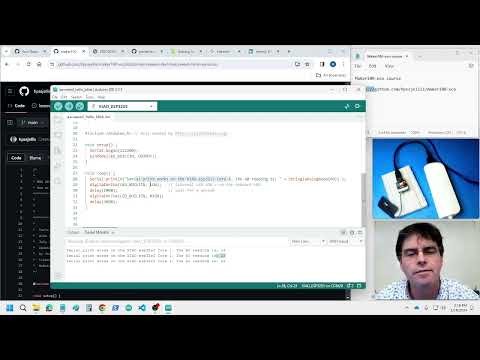 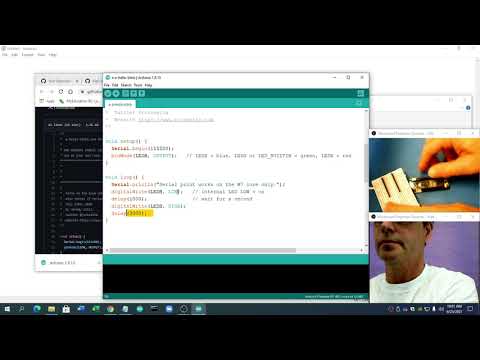 |
Print other things and change the pattern of blinking delay times |
a04 Put the above Vision model on the XiaoEsp32s3 Using the Arduino IDE |
seeed-edgeimpulse-vision-fomo.ino | 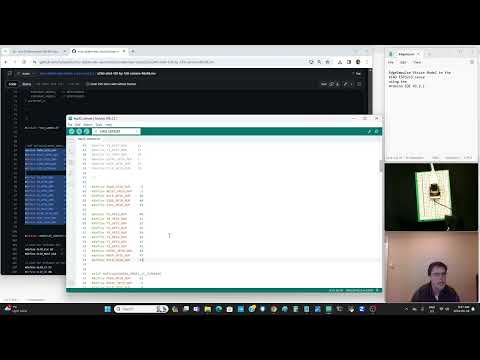 |
Set Arduino Tools-->PSRAM-->OPI PSRAM and presently for Vision must use the OLD Arduino IDE ~1.8.19 Note: on edge impulse turn off the EON compiler before exporting the library. |
a05 Put the above Vision model on the XiaoEsp32s3 Using SenseCraft |
direct webpage https://seeed-studio.github.io/SenseCraft-Web-Toolkit/ | On edgeimpulse dashboard export your model using Int8 quantized and upload using Sensecraft | |
a06 Using your cell phone to make a FOMO model |
No unknown and must choose bounding boxes. Still use grayscale and 96x96 resolution | ||
a07 Put the FOMO model onto the XiaoEsp32s3 |
seeed-edgeimpulse-vision-fomo.ino | Unlike Vision, FOMO works on the new Arduino IDE, same code as for vision. |
Must download the deplyment Arduino library from EdgeImpulse and see the example to get the include filename. then copy that include file name to the code to the left. |
Note: soldered headers not needed, but a cell phone or webCam laptop is needed, along with a USB-C to USB-A cable and a micro sd-card Students are encouraged to work ahead.
| Topic | Example Code | Video | Instructions and Prompt |
|---|---|---|---|
a08 Use your cell phone to make a Yes, No, unknown Sound Model |
Follow the wizard on Edgeimpulse to make a verbal Machine Learning model using your cell phone. Then download the Arduino deployment, install the zipped Arduino library and choose the default Portenta Sound example. Then talk into your Portenta and view the Serial Monitor. Then get the onboard LED to respond to your voice. | ||
a09 Put the sound model onto your XiaoEsp32s |
seeed-edgeimpulse-sound.ino | Make the normal edgeimpulse.com sound model. then deplyment -->Arduino and add the zipped library to the arduino IDER. Then view the example to get the proper include filename and use that include file name with the code provided. | |
a10 (optional) Try the Edgeimpulse connection method |
edgeimpulse.com | ||
a11 Nothing Yet |
|||
a12 Nothing Yet |
|||
a13 XiaoEsp32s3 camera to micro sd-card to FOMO model to XiaoEsp32s3 |
seeed-cam-to-sd-card.ino then seeed-edgeimpulse-vision-fomo.ino | Must download the deployment Arduino library from EdgeImpulse and see the example to get the include filename. Then copy that include file name to the code to the left. More Instructions#define PWDN_GPIO_NUM -1#define RESET_GPIO_NUM -1 #define XCLK_GPIO_NUM 10 #define SIOD_GPIO_NUM 40 #define SIOC_GPIO_NUM 39 #define Y9_GPIO_NUM 48 #define Y8_GPIO_NUM 11 #define Y7_GPIO_NUM 12 #define Y6_GPIO_NUM 14 #define Y5_GPIO_NUM 16 #define Y4_GPIO_NUM 18 #define Y3_GPIO_NUM 17 #define Y2_GPIO_NUM 15 #define VSYNC_GPIO_NUM 38 #define HREF_GPIO_NUM 47 #define PCLK_GPIO_NUM 13 ChatGPT Prompt... |
|
a14 EdgeImpulse cell phone motion x,y,z model |
Do this for later in the course when we use the RAK2270StickerTracker to get an idea of what we are doing. If you have a motion sensor for the XiaoEsp32s3-sense then you could upload this model to it but that is optional | ||
a15 Vision regression Analysis |
Same as Vision Classification except no unknown and each label is an integer value. At the Add a Learning block add the normal "Transfer Learning" but also add Regression. Regression is trained each label being an integer value reflecting some size amounts. We will do the distance to a a computer mouse from above. Try to train 1m, 2m and 3m. Then on classification the model should estimate the distance. | ||
a16 Vision Anomaly Detection |
This time you visually train on what you expect. You can do 0unknow and 1pen ike the first vision classification example. Anomoly rates how different the result is from the training as a digital percent. At the Add a Learning block add the normal "Transfer Learning" but also click "Show all blocks" and find Anomoly. Then on classification the model should detect the pen and rate it's anomoly. |
Note: For the 2nd day of a conference users without soldered pins may want to try the IOT part of the course #iot-part-of-the-in-person-course-using-the-xiaoesp32s3-sense
Note: soldered headers are now needed on the XiaoEsp32s3-sense Students are encouraged to work ahead of the class.
| Topic | Example Code | Video | Instructions and Prompt |
|---|---|---|---|
a17 VIDEO-FLAC |
 |
Try all the main programming steps in C/C++ on the XIAO using the examples in the Dot7 folder of the Portenta Pro Community Solutions Arduino Library here Don't do Dot71 as that is for another assignment. More InstructionsNote: Video-Flac translates to Variables, Input/Output, Decisions, Events, Objects/Structs - Functions, Loops, Arrays, ClassesChatGPT Prompt... |
|
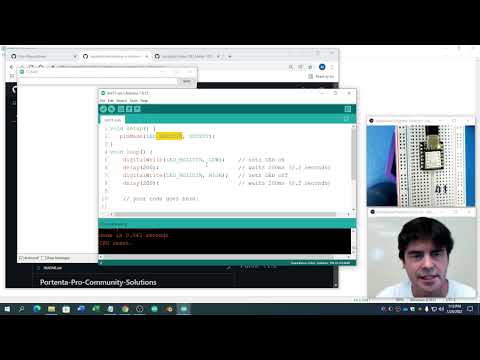
a18. Button causes LED to blink |
seeed-led-button.ino | 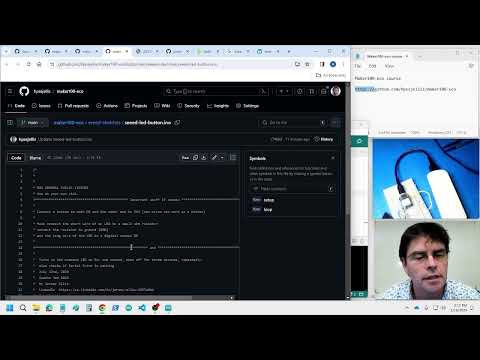 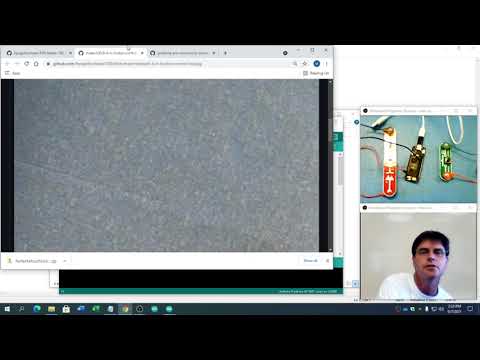 |
 Control the LED with the button, then control multiple LED's with Multiple Buttons. Note: Can't control large current flow devices, WHY? Could you make the external LED interact like the internal LED? |
a19 Flash SOS |
dot71-sos | 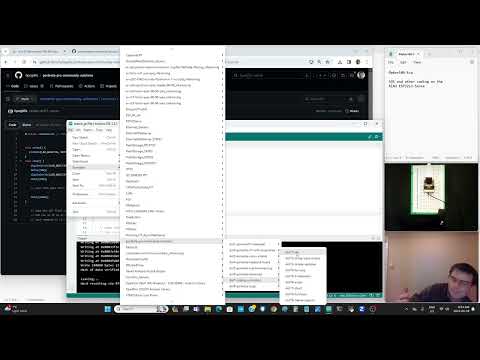 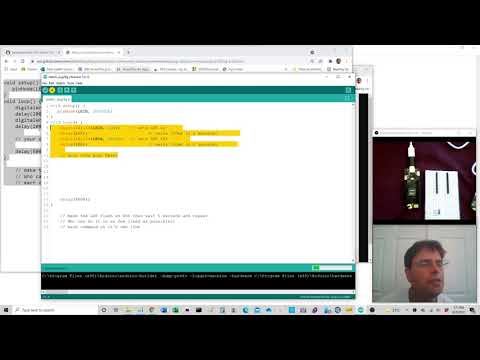 |
Get the code running to flash the LED_BUILTIN, then have it flash an SOS. 3 short flashes, 3 long flashes, 3 short flashes then a 5 second rest. |
a20 Analog Read (Voltage divider for various 2 prong sensors (variable resistors: flex sensor, photoresistor, touch/pressure sensor)) |
dot211-any-variable-resistor-sensor.ino | 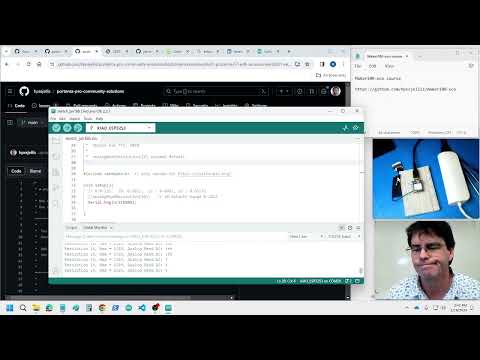 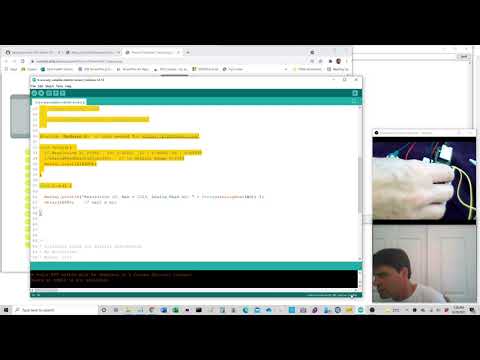 |
Change the Resistor amount and which resistor is attached to 3V3 to get the largest most sensible range of readings. |
a21 Another two wire sensor |
Figure out how to read the sensor from another variable resistor sensor like a flex sensor, photo-resistor, pressure sensor etc. | ||
a22 Game Controller/JoyStick |
Figure out how to use the 3 wires (3V3, GND, A0) for one dimension of a joystick | ||
a23 Range-Finder |
dot214-RangeFinder.ino | 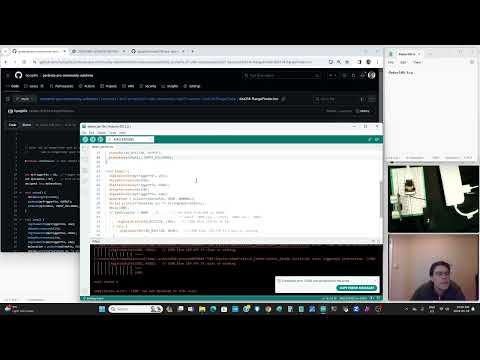 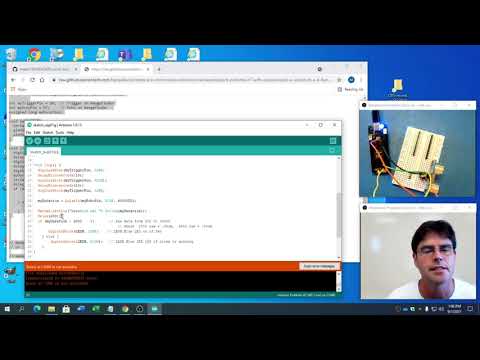 |
For this assignment a variable in the code can be changed to make the range finder work at a greater distance. |
a24 XiaoEsp32s3 Image to SD Card |
A great bit of code to run is seeed-cam-to-sd-card.ino which allows pictures in JPG format to be loaded onto the SD card based on a user set delay. | You will need a micro SD card. | |
a25 XiaoEsp32s3 Video to SD Card |
seeed-video-to-sd-card.ino which allows video in MPEG format to be loaded onto the SD card based on a user set delay. | You will need a micro SD card. | |
a26 XiaoEsp32s3 Sound to SD Card |
a02-sound-to-sd-card.ino COMPILER ISSUE NOT YET READY Example PDM then use your cell phone to make a sound model on EdgeImpulse. Such as your name. The download the arduino file and get your Xiao recognizing your name by lighting the onboard LED. | This is another one students can probably do themselves using the default programs for the XIAO called the PDM. Instead of the serial monitor load the Serial Plotter to see your voice when you speak. Then make the edge impulse sound model and load it on your XIAO. | |
a27 Serial SPI Pixy2 |
dot212-pixy2-SPI.ino Note: Dot212 Pixy example using the Portenta pro community solutions library will be pre-setup with the pixy include files! | 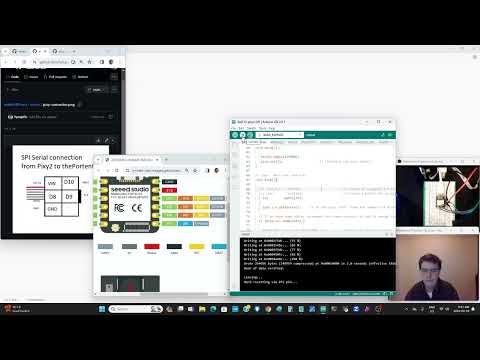  |
 The Pixy2 is so cool students will have no problem coming up with things to detect. The Pixy2 is really good for a final project since students just need to connect an actuator. Example: when you see the "orange" cat have a servo open a lever to feed it. |
a28 Acclerometer |
seeed-accelerometer-adxl362.ino |  |
Read the sketch to find out the connections. VIN: 3V3, GND: GND, SCL: D8 (SCK), SDA: D10 (MOSI), SDO: D9 (MISO), CS: D7 (SS) upload code and look for -9.8 m/s^2 due to gravity |
a29 GPS |
dot215-grove-gps-air530.ino Only proof of connection. | Try https://www.gpsvisualizer.com/ with the data saved with .GPS extension Real Assignment: Parse the output for Latitude, Longitude, date time and height, perhaps use: TinyGPS, TinyGPS++, TinyGPSPLUS, NeoGPS libraries. Then paste your latitude, longnitude into this url /maps?q=lat,lon example: http://maps.google.com/maps?q=62.44,-114.4 for Yellowknife Canada | |
a29B Edge-Impulse-Vision-FOMO with Grayscale OLED |
Use the Vision grayscale OLED from above and the dot5148-advanced-fomo-individual-count | 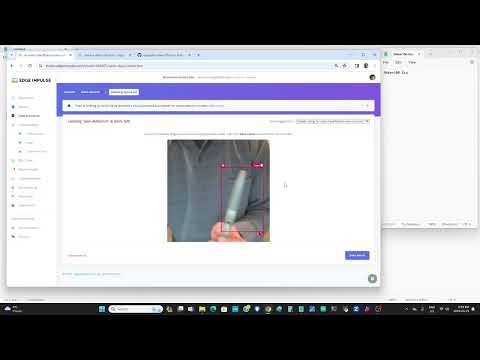 Note: Use the Portenta Pro Library as the include file will auto load. Then just change the deployed Edgeimpulse include file to the correct name. Note: Use the Portenta Pro Library as the include file will auto load. Then just change the deployed Edgeimpulse include file to the correct name. |
Like the original classification model, just now with bounding boxes and you label each object to detect |
Note: soldered headers are now needed on the XiaoEsp32s3-sense Students are encouraged to work ahead of the class.
| Topic | Example Code | Video | Instructions and Prompt |
|---|---|---|---|
a30 Servo |
seeed-servo-needs-ESP32Servo-include.ino |   |
MUST HAVE AN EXTERNAL BATTERY TO RUN THE 6 VOLT SERVO! Need the negative GND from the external battery to run to both the XIAO and the servo. Also you need to find the library and include it #include <ESP32Servo.h> I have the Pololu Servo Product number 1057, Power HD High-Torque Servo 1501MG here. To connect XIAO D5 (orange wire) GND (brown wire) to the servo, 6 volt battery positive (red) and Negative (brown) to servo. |
a31 PNP Transistor |
dot224-pwm-transistor.ino | 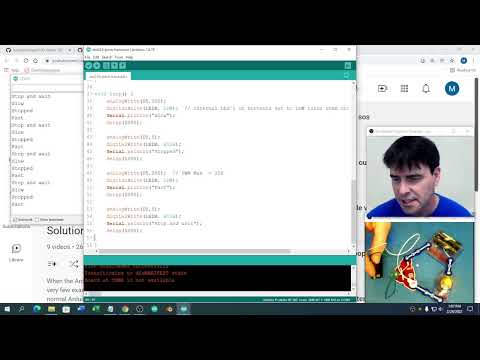 |
 Make either PNP transistor with a small motor. |
a32 NPN Transistor |
dot224-pwm-transistor.ino | |
 Make an NPN transistor with a small motor |
a33 Nothing Yet |
|||
a34 Small Dual DC Motor Driver |
dot226-small-dual-dc-motor-driver.ino |  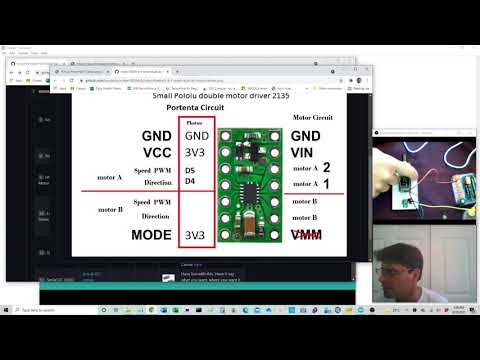 |
 Get a small motor working using it's own power supply and change the code so it does what you want. Pololu #2135 DRV8835 Dual Motor Driver Carrier here |
a35 Large DC Motor Driver |
dot227-big-dc-motor-driver.ino |  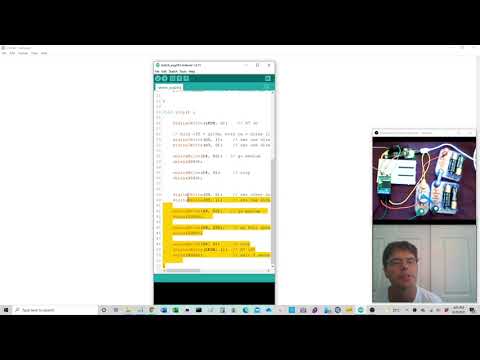 |
 Get a 6V motor running and change code for it to do what you want. Protect the Phton from the 6 Volt motor side. Check Pololu 1451 VNH5019 Motor Driver Carrier here |
a36 Stepper Motor |
dot225-stepper-motor.ino | 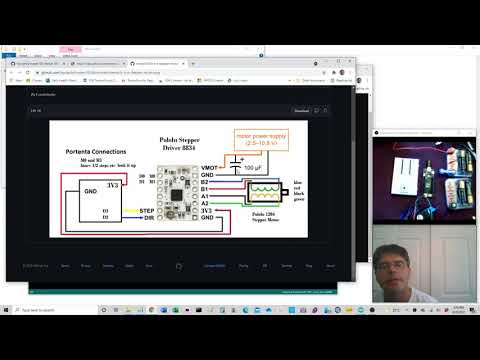 |
 Note: This stepper needs 6V, Change code to do what you want. Pololu 2134 DRV8834 Low-Voltage Stepper Motor Driver Carrier here |
a37 Multiplexer (mux) (Presently not working so make this optional) |
Connect the XIAO using I2C to a multiplexer a device that allows more pins to be used when your board runs out of pins Typically for a large project | ||
a38a Use a 2nd XIAO as an I2C multiplexer |
Thanks Leander and Giorgio I2C reciever: seeed-i2c-2xiao-receiver.ino I2C transmitter seeed-i2c-2xiao-transmitter.ino |
important: on the first XIAO you must have a pullup 4.7 kOhm resistor between SDA and 3V3 and also between SCL and 3V3. On all XIAO board I2C SDA is D4 and SCL is D5 just connect them on each board, making these connections really easy. If you want the first board to power the second board just connect GND to GND and 3V3 to 3V3. Theoretically if you need even more pins you can connect a third etc XIAO board. For an advanced ability try 2 way communication. | |
a38b Use a 2nd XIAO as a UART Serial multiplexer |
UART reciever: 2xiao-uart-receive.ino UART transmitter 2xiao-uart-transmit.ino |
Connect the transmitter TX pin (D6) to the receiver RX pin (D7) If you want the first board to power the second board just connect GND to GND and 3V3 to 3V3. For an advanced ability try 2 way communication. | |
a39 Serial I2C OLED |
dot222-I2C-grove-OLED.ino |   |
 Have fun with this. Have it say what you want, where you want it and for how long. |
a40 XiaoEsp32s3 waveshare-greyscale-oled |
seeed-waveshare-grayscale-oled.ino then try with the camera seeed-camera-grayscale-waveshare-oled.ino | 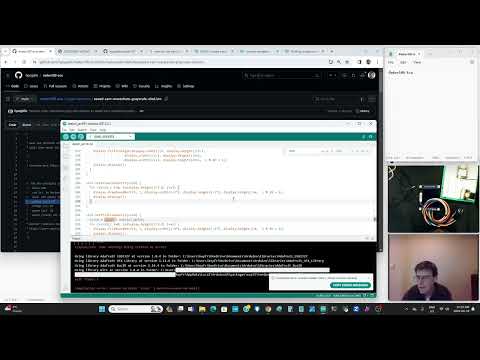 |
Get thee Grayscale Waveform 128x128 OLED |
a41 XiaoEsp32s3 camera 96x96-waveshare-greyscale-oled |
seeed-camera-96x96-to-waveshare-grayscale-oled.ino | 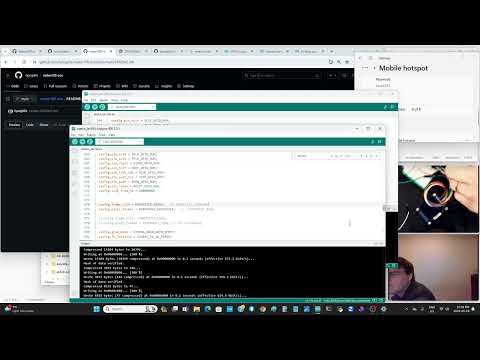 |
Get the XIAO Camera working with the Grayscale Waveform 128x128 OLED Note: Thsi camera can do much better resolution than 96x96 but that is one of the best resolutions to do Machine Learning with. |
a42 e-ink display |
See Ambrose until he has a solution. presently use the Waveshare e-ink libraries. File here Must edit the epdif.h file to list which pins to use Pin definition #define RST_PIN 5 #define DC_PIN 4 #define CS_PIN 3 #define BUSY_PIN 2 The tensorflowlite code is dot521-rocksetta-hello-ml-sine.ino |
||
a43 TFT Touch Screen or 128x128 Grayscale Fast refresh OLED |
dot218-TFTV2-touchScreen.ino or dot229-128x128-gray-oled.ino | 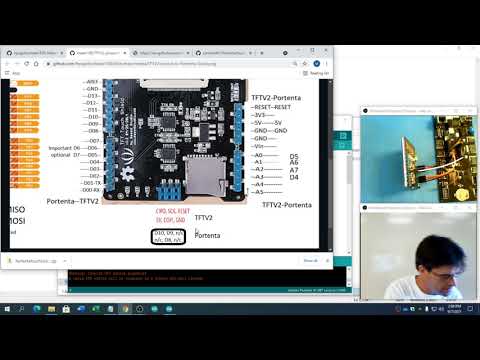 |
 Real Assignment: Presently the Touch Screen sensor is not reading completly to the edges of the screen, see if you can figure out why? Is it just the mapping of raw values to real values, the main resistor amount set at 300 ohms, the wire length. What is it? Fix it. |
a44 PCB Board Build using easyEDA |
Great starter tutorial to make a PCB with a battery holder, resistor and ligtht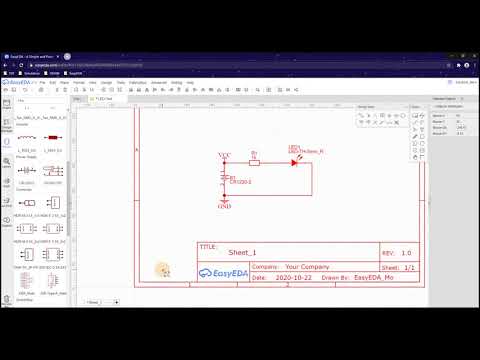 |
I have found lots of PCB design videos that are either to complex or just long and boring. The video pressented here was not made by me but is very short and many of my animation students can follow it very quickly to make their own board using easyEDA | |
a45 Lidar Basics |
seeed-lidar-serial.ino IMPORTANT: on Lidar GND is the yellow wire! Needs 5V to run. Connect green wire to XIAO-esp32S3 RX (D7) to receive data. | Try the first code to see if the lidar works over the serial monitor, then the second code: | |
a46 Lidar with Grayscale OLED |
seeed-lidar-oled.ino IMPORTANT: on Lidar GND is the yellow wire! Both Lidar and OLED need 5V to run. Connect green wire to XIAO RX (D7) to receive data. Grayscale OLED connections in the code: red 5V, GND to GND, blue D10, yellow D8, green D0, orange D1. | ||
| d100 lidar datasheet |
Note: soldered headers not needed (this part of the course could be done earlier) Students are encouraged to work ahead of the class.
| Topic | Example Code | Video | Instructions |
|---|---|---|---|
a47 WiFi WebServer |
seeed-wifi-server.ino | 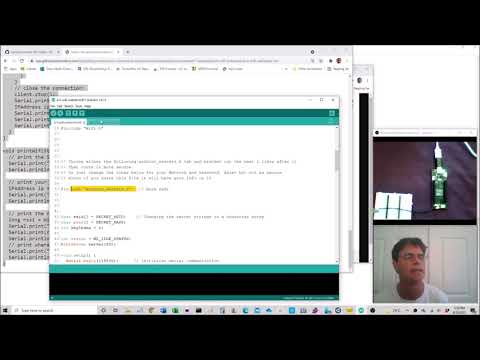 |
You will need to setup a hotspot with a SSID and PASSWORD on a local network and then go to the url in the serial monitor on a computer or cell phone connected to the same local network |
a48 Camera Streaming |
Load the XIAO_ESP32S3 board in the Arduino IDE, The look for the examples: esp32 --> camera --> cameraWebServer | ||
a49 Sound Streaming (Not yet done, maybe can't be done) |
|||
a50 Serial-putty or Linux "screen" |
This is a program to load on your computer that replaces the arduino serial monitor | Fairly easy once putty is installed. Load power shell and type mode with your Portenta programmed with a serial monitor program find the port. Then switch to Serial on Putty and Correct the COM port. Open and see if you can see serial output from the Portenta | |
a51 Web-AdafruitIO-Connectivity |
MQTT-ESP32-Websocket seeed-adafruit-mqtt-g.ino The MQTT library to install was written by Joel Gaehwiler and is way down on the arduino library install list |
First adafruit login Then setup a webpage websocket to see how things work use this webpage ada-websocket02.html Use the key and username from the Adafruit "IO" site. Lots of information for the PortentaH7 at this website Adafruit-Connectivity |
This is a good but large project. A lot for things to learn here |
a52 Bluetooth Connectivity |
seeed-draft-BLE.ino | The ESP library should have some BLE code. You will need an App like NRF connect by nordic semiconductor to see the BLE connection | |
a53 Nothing Yet |
This part of the course is much more challenging than the above. Some teachers may choose to do it for an advanced 2nd year part of the program. I typically let students who have done the course before or are going very fast through the course in the first year to do this part.
Note: The actual sticker tracker would not be needed for a one hour session
| Topic | Example Code | Video | Instructions and Prompt |
|---|---|---|---|
a54 Overview of the Rak2270 |
Reminder of basic AT commands and RAKDAP1 wiring to RAK2270 rak-sketches/README.md |
TrackPac, 1663, LoRaWan, then P2P LoRa Motion Machine Learning using TinyMLjs, WebSerial LoRa Summary |
using one RAK2270 as the P2P receiver
Note: Each person or group will need the RAK2270 Sticker Tracker Developer kit with serail rig called the clip
Needs testing, might need a Linux computer to run the ML programs.
| Topic | Example Code | Video | Instructions and Prompt |
|---|---|---|---|
a55 RAK Read values and Hello Serial Monitor |
rack-send08-receive.ino also for AT commands look at rak-at-commands.md |
   |
Get used to uploading code by serial monitor "AT+BOOT". To reset code typoe "AT+RUN" Use the RAK rig and connect to the Arduino serial monitor to read all the present set LoRa and LoRaWan variables |
a56 (Optional) RAK2270StickerTracker trackpac.io setup |
If you have the original RAK2270 Sticker Tracker with TrackPac.io then set it up and monitor your deivce | ||
a57 Machine learning motion x,y,z two label tinyML model |
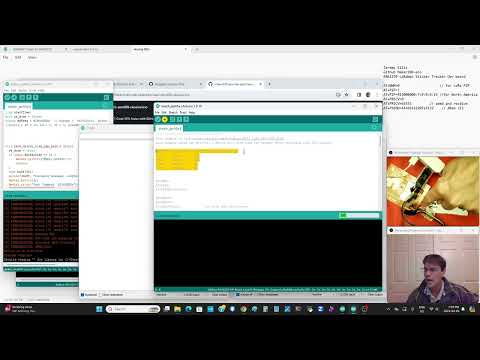
Reminder put RAK2270 into AT+BOOT for boot mode. Load d05-webSerial-works.ino Then go to the static webpage at tinyMLjs for the RAK2270StickerTracker which will walk you through making the c-header code for a machine learning model | This is advanced and uses webserial to get data from the RAK, then TensorflowJS to make a machine learning model, then iPython Notebook to convert TFJS to Keras then to tFlite then to a c-header file. That test c-header file can then be included in the arduino code for exercise A59. (This is advanced) | |
a58 LoRa webSerial reciever |
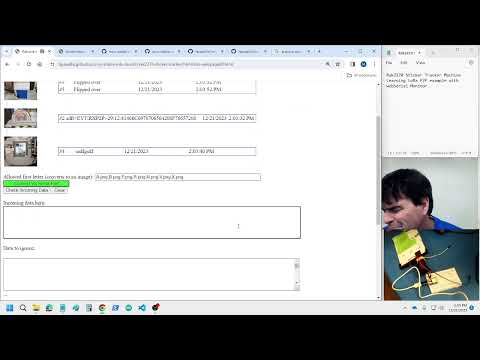
Install on the RAK2270 use AT+BOOT l10-lora-p2p-receive-working.ino. Run https://hpssjellis.github.io/mcu-stable-edu-launch/rak2270-sticker-tracker/html/lora-webpage-best.html webpage and connect the RAK2270 to it using webSerial. Any RAK2270 or other LoRa P2P devices will send to this website. This webpage will receive any RAK p2p data sent from the other assignments such as A55 rack-send08-receive.ino | 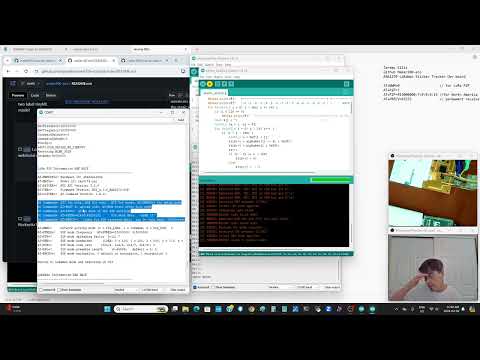 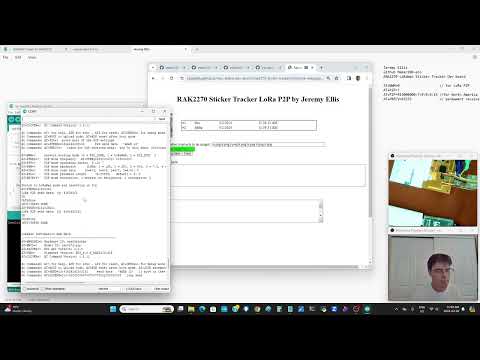 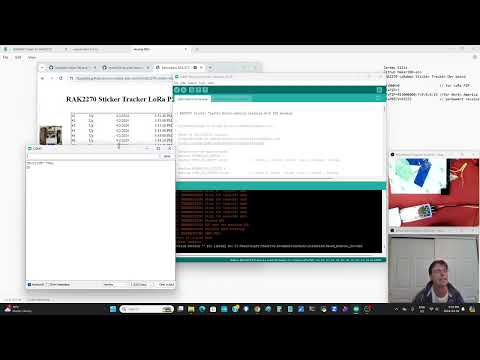 |
Another advanced use of a static website and webSerial to connect one sticker tracker to receive P2P LoRa information from the other motion machine learning trained devices More InstructionsThe website is from my page, if you want to edit it, just download the entire maker100-eco repository and go to the folder rak-sketches/rak-html/lora-webpage-best.html from your computer so you can make changes. Typically these websites need to run from an https webpage but I think these run fine from your own computer even if the internet is shut off |
a59 RocksettaTinyML |
Not as hard as it looks. Uses the website from A58 to record machine learning motion on the RAK2270. Download this github as a zip file https://github.com/hpssjellis/RocksettaTinyML and install on the arduino IDE usinging the menu "sketch" --> "Include Library" --> "Add .Zip Library" After the RocksettaTinyML library is installed, load the example: "File" --> "Examples" --> "RocksettaTinyML" --> "RAK2270"-->"ml"-->"RAK2270-motion-2-label" Compile it and seee if it works. Note: must have LoRa P2P support but not LoRaWan support. When you have proof that this runs, then change the main code to --> rak2270-motion-2-label-p2p-serial-WORKS2.ino This code should work with A58 sending the machine learning data to the P2P website that receives the data |
Note: You can use the machine learning model you made in assignment A57 but easier for testing just to use the default ML code included with the RocksettaTinyML example. | |
Students are encouraged to work ahead of the class.
| Topic | Example Code | Video | Instructions |
|---|---|---|---|
a60 LoRaWan and LoRa P2P Test |
rak-hack06.ino | 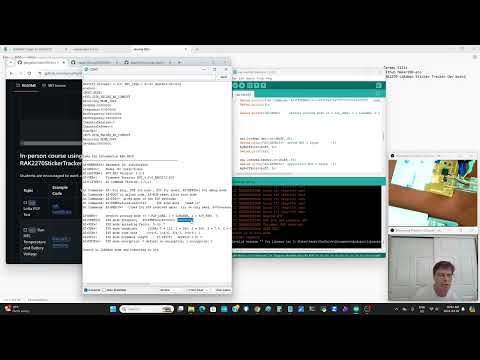 |
Shows many AT commands and switches between LoRaWan and LoRa settings. Your device should be able to send data to your teachers device over a local P2P LoRa network Students can try send there teacher their first names. AT+PSEND=41426162207A3132 should be "ABab z12" See chart |
a61 Run NTC Temperature and Battery Voltage |
RAK-NTC-temp.ino | 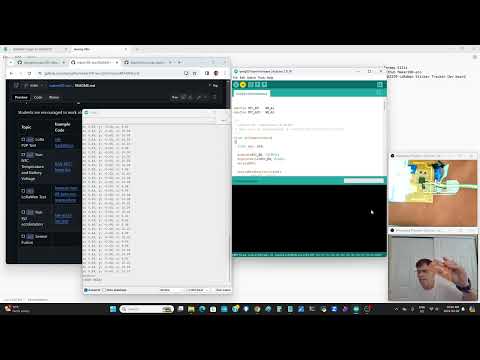 |
Code prints out the battery voltage and board temperature. This gives us a chance to test other battery sources. Reminder anything over 5V may damage this board and even 5V might not work well. Research max and minimum acceptable votages. |
a62 LoRaWan Test |
lorawan-test-08-byte-xyz-mapped.ino with this js decoder file for datacake configuration cayenneLPP.js | Get a test login to the console for either meteoscientific.com or helium-iot.eu and 1. set a device-profile for US915 and a codeC "cayenneLPP". then an application and on integration switch to datacake Devices, LoRaWan "show setup instructions" switch back and paste that HTTP URL. The back to applications and make a device with DevEUI, AppEUI (called Join eui) and then APpKey. Power up the RAK2270 and monitor debug windows etc. Back on Datacake go to configurations and decoder and past the cayenneLPP.js decoder and try some raw data. if that works then click the fileds and see if you can auto add them. then make a dashboard on datacake with the new fields. Note: I think the acceleration actual data has issues see if someone can fix it. | |
a63 Run xyz acceleration |
rak-accel-imu.ino | 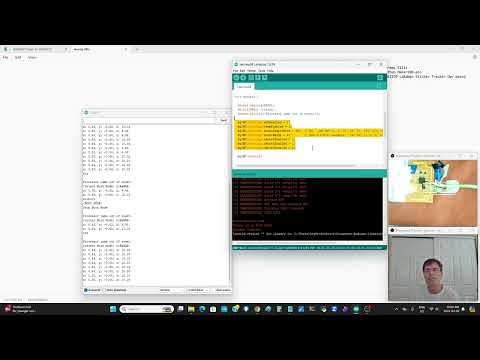 |
Fairly easy acceleration x, y, z example. Only problem here is the Rak clip does not work well with motion. the teacher should have a few boards with soldered wires that can be used well with motion. |
a64 Sensor Fusion |
You make this file. you have the code above. Run code with all the Sensors on the RAK2270: temperature, Humidity, 3 axis IMU: motion (xyz) | ||
a65 LoRaWan-raw-number |
lorawan-test-send-2-bytes.ino with a simple js decoder 2-bytes.js | Theoretically this should be easier than the cayenneLPP setup, but we need simple code and a javascript decoder. See what you can do. | |
a66 STM32CubeProgrammer with STLINK V2 |
Try this blank sketch compiled binary file which allows theAT commands only rak-only-at-commands.hex |
 |
Use the rak clip to access a few of the pins on the RAK2270 to see if you can program thme |
a67 Easy and Hard pins test |
Use the RAKClip or Solder wires to the pads on the rak2270 and do some pin testing like you would for an Arduino | ||
a68 |
Final Course Projects (Student must complete an individual final project to pass my in-person course, your teacher might have different ideas)
| Topic | Example Code | Video | Instructions |
|---|---|---|---|
FP1 One sensor with one actuator final project |
More Instructions...ChatGPT Prompt... |
||
FP2 complex sensor, ML, actuator final project |
More Instructions...ChatGPT Prompt... |
||
FP3 group final project, proof of concept for a viable product |
More Instructions...ChatGPT Prompt... |
View the old maker100 course for the Portenta Pinout Diagram

